Vxxx_Triplets_schematics.rar 2779 KB
V980_schematics.rar 1669 KB
V635_schematics.rar 944 KB
V630_schematics.rar 391 KB
V557_schematics.rar 622 KB
V547_V551_V555_schematics.rar 754 KB
V360_schematics.rar 391 KB
V300_V500_V600_schematics.rar 903 KB
V220_schematics.rar 2042 KB
V180_schematics.rar 643 KB
V177_schematics.rar 762 KB
V175_schematics.rar 1053 KB
V171_schematics.rar 818 KB
V150_schematics.rar 680 KB
V100_schematics.rar 3338 KB
V80_schematics.rar 2700 KB
V70_schematics.rar 1019 KB
V66_schematics.rar 2443 KB
V3x_schematics.rar 1962 KB
V3i_schematics.rar 590 KB
V3_schematics.rar 387 KB
U6_schematics.rar 4549 KB
T720_schematics.rar 970 KB
T200_T205_schematics.rar 5729 KB
T193_schematics.rar 2239 KB
T192_schematics.rar 2017 KB
T190_T191_schematics.rar 281 KB
SM_L6_A4_C_L12_V1_1_.0.rar 1215 KB
MPX220_schematics.rar 1523 KB
Motorola_V66i_lvl3_Schematics.rar 4110 KB
V177_schematics.rar 762 KB
V175_schematics.rar 1053 KB
V171_schematics.rar 818 KB
V150_schematics.rar 680 KB
V100_schematics.rar 3338 KB
V80_schematics.rar 2700 KB
V70_schematics.rar 1019 KB
V66_schematics.rar 2443 KB
V3x_schematics.rar 1962 KB
V3i_schematics.rar 590 KB
Motorola_v60g_level3_Schematics.rar 5212 KB
Motorola_mpx200_Sschematics.rar 6583 KB
Motorola_c350_level1-2_Schematics.rar 1374 KB
M3x88_schematics.rar 1576 KB
L7_schematics.rar 654 KB
E1070_schematics.rar 703 KB
E1000_schematics.rar 4273 KB
E770_schematics.rar 1956 KB
E680_schematics.rar 1228 KB
E398_schematics.rar 4032 KB
V3_schematics.rar 387 KB
U6_schematics.rar 4549 KB
T720_schematics.rar 970 KB
T200_T205_schematics.rar 5729 KB
T193_schematics.rar 2239 KB
T192_schematics.rar 2017 KB
T190_T191_schematics.rar 281 KB
SM_L6_A4_C_L12_V1_1_.0.rar 1215 KB
MPX220_schematics.rar 1523 KB
Motorola_V66i_lvl3_Schematics.rar 4110 KB
E365_schematics.rar 731 KB
C975_C980_schematics.rar 6432 KB
C650_schematics.rar 1197 KB
C550_schematics.rar 1250 KB
C450_C370_schematics.rar 1641 KB
C380_schematics.rar 1365 KB
C330_Schematics___PCB.rar 1571 KB
C257_C261_schematics.rar 3120 KB
C250_schematics.rar 1451 KB
C250_C350_schematics.rar 1451 KB
C200_schematics.rar 514 KB
C155_C156_schematics.rar 4694 KB
C139_schematics.rar 1638 KB
C118_schematics.rar 1009 KB
C115_schematics.rar 856 KB
A1000_schematics.rar 1636 KB
A920_A925_schematics.rar 2097 KB
A835_schematics.rar 2371 KB
A820_A830_schematics.rar 1952 KB
A780_schematics.rar 948 KB
May 29, 2010


May 28, 2010
SAMSUNG E2120i 1000000% BLINKING SOLUTION WHIT UFS HWK By Golden Md-Parvez.Ailom
USE UFS HWK
SELECT model E2120B
THEN FLASH
UES THIS FLASH FILE
Download...
http://www.mediafire.com/?39v5m48d4wy76ii
SELECT model E2120B
THEN FLASH
UES THIS FLASH FILE
Download...
http://www.mediafire.com/?39v5m48d4wy76ii
May 25, 2010
spider-man flash files and pinouts "request here
in order to make it easier to find your
needed flash files or pinout .
please post here your request
but kindly read this post first before you ask for
somthing.
http://forum.gsmhosting.com/vbb/showthread.php?t=632072
link..
thank you
needed flash files or pinout .
please post here your request
but kindly read this post first before you ask for
somthing.
http://forum.gsmhosting.com/vbb/showthread.php?t=632072
link..
thank you
Video Tutorials to make UFS+HWK more easy to use

http://rapidshare.com/files/24807679...TINGS.exe.html
http://rapidshare.com/files/24807847...ADING.exe.html
http://rapidshare.com/files/24807874...ASING.exe.html
http://rapidshare.com/files/24807888...SHING.exe.html
http://rapidshare.com/files/24807908...TINGS.exe.html
http://rapidshare.com/files/24807923...ADING.exe.html
http://rapidshare.com/files/24807967...ADING.exe.html
http://rapidshare.com/files/24807990...USING.exe.html
http://rapidshare.com/files/24808167...oblem.rar.html
May 14, 2010
FIRMWARE SPIDERMAN UPDATE
BY : MOBILE TECHNOLOGY
PADANGSIDIMPUAN
MITO 288GG :
http://rapidshare.com/files/168186210/Mito_288GG.bin.html
STARTECH (ST 67 ) :
MTK 6205 :
http://rapidshare.com/files/168190994/ST67_6205.bin
MTK 6226 :
RapidShare: Easy Filehosting
PADANGSIDIMPUAN
MITO 288GG :
http://rapidshare.com/files/168186210/Mito_288GG.bin.html
STARTECH (ST 67 ) :
MTK 6205 :
http://rapidshare.com/files/168190994/ST67_6205.bin
MTK 6226 :
RapidShare: Easy Filehosting

100% solution to upgrade 3G 3GS 4G to 4.1 without upgrading the baseband (windows)
i am going to share 100% solution tested by me to upgrade to 4.1 without having anything effect on the baseband
you can use it even the phone is on stuck on recovery loop or on apple logo after erasing all contents :
use the latest version of redsnow i.e. 0.9.6b2
download it from here:
Redsnow
and download the stock original firmware 4.1 for the phone here:
Iphone 4G
Iphone 3GS
Iphone 3G
Step 1 ::
First you need to open Redsn0w 0.9.6b2 in Windows. The first screen will have you browse for your firmware file. You should navigate to the FACTORY firmware file that you downloaded. I don’t know why but they didn’t include the option to enter Pwned DFU mode on the first screen of Redsn0w so you have to select a factory firmware file to bypass this part of the process
Step 2::
After you have selected the factory firmware file that you downloaded, if you have an iPhone 3Gs it will ask you whether you have the old or new(patched) model. If you have the new(MC) model then select “YES” this is VERY important, if you have the new model and you select no you will have to restore with a factory 4.1 firmware file which will take away the possibility to jailbreak. (To identify if you have MC or Non MC model, go to Settings – General – About and scroll down to Model. If it’s MCXXXX then you have new (MC) model. If it’s something like MBXXXX, then you have old (non MC) model.)
Step 3::
Now click “next” and you will see Redsn0w apply kernel patches to the IPSW you selected.
Step 4::
On the next screen is where you’re gonna have a few different options. You may see more options than what are shown below, the important thing is that you want to select ONLY the option which is “Just enter pwned DFU mode right now” This option is basically doing what the DFU button in Pwnage Tool for Mac users does.
Step 5::
This is another CRUCIAL step, I cannot stress enough that you should ALWAYS read instructions carefully and make sure you are doing things right. Please power off your device while the device is plugged into the computer. DO NOT click “next” until your device is both powered off AND plugged into the computer.
Step 6::
This is a step we should all be quite familiar with, now we have to put the device into DFU mode. Just follow the on-screen instructions exactly how they are displayed and you will be fine.
Step 7::
If for whatever reason things get screwed up and you didn’t follow the instructions correctly you will see a screen like the one below. If that is the case please start over and read carefully, if you do not see a screen like the one below please continue to the next step!
Step 8::
Alright, we are nearly there! Congratulations on making it this far! We are but mere minutes away from having a jailbroken 4.1 device with the old(unlockable) baseband! After Redsn0w detects your device in DFU mode it will begin processing again and you will see it applying the Limera1n exploit to your device.
Step 9::
Alright, you are all set to restore your custom firmware! After you have applied the Limera1n exploit, you should see the screen below informing you that you should now be able to shift+restore in iTunes to restore with a custom firmware file. Click “Finish”
Step 10::
Now download the custom firmware for your phone and restore it
(using shift and restore)
Download the custom acitavted firmwares from here :
Iphone 4G
Part 1
Part 2
Part 3
Iphone 3GS
Part 1
Part 2
Iphone 3G
Part 1
Part 2
And you got the phone upgraded with the baseband intact
and all done and please feel free to contact me via any messenger in ma profile if u need ma help on any step
May 11, 2010
How to Jailbreak Your 2.x.x 3G iPhone Using QuickPwn (Windows)
These are instructions on how to jailbreak your 3G iPhone to the 2.1-2.2.1 iPhone firmware using QuickPwn for Windows.
If you are intending to unlock your iPhone you can use this tutorial to jailbreak ONLY if you are on the 02.28 baseband or lower AND you restore to 2.2 (NOT 2.2.1). If you use this tutorial to restore and to jailbreak firmware 2.2.1 there is no unlock currently available. You can learn how to check your baseband version here
Step One
Create a folder called Pwnage on your desktop.
Download the following files and place them in the Pwnage folder you just created:
- QuickPwn-225-2.zip
FOR THOSE WHO WANT TO UNLOCK:
- 2.2.0 (3G): iPhone1,2_2.2_5G77_Restore.ipsw
FOR THOSE WHO DO NOT WANT TO UNLOCK:
- 2.2.1 (3G): iPhone1,2_2.2.1_5H11_Restore.ipsw
Extract the QuickPwn-225-2.zip file to the Pwnage folder.

Step Two
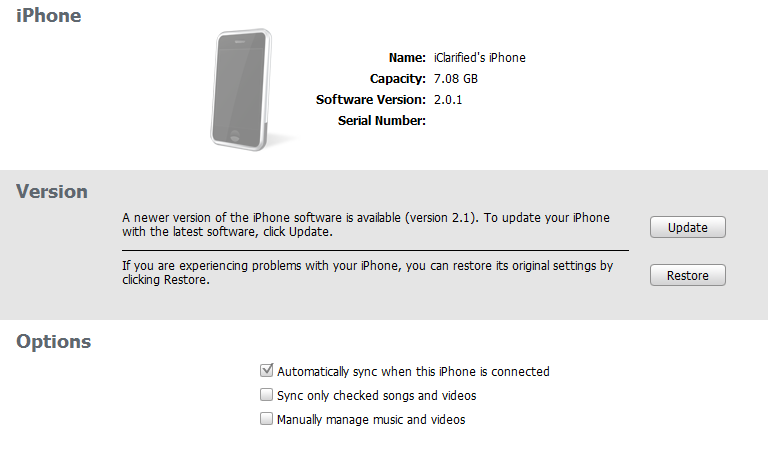
Connect your iPhone to the computer and launch iTunes.

Select your iPhone from the list of devices on the left. Now hold down shift and click the Restore button. Restore is preferred as it won't create any wasted space on your iPhone.

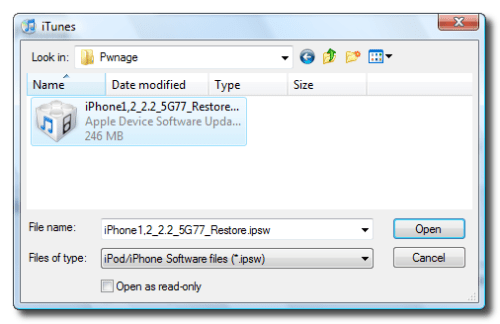
Navigate to the Pwnage folder on your desktop and select the firmware ipsw. Click the Open button to continue.
Step Three
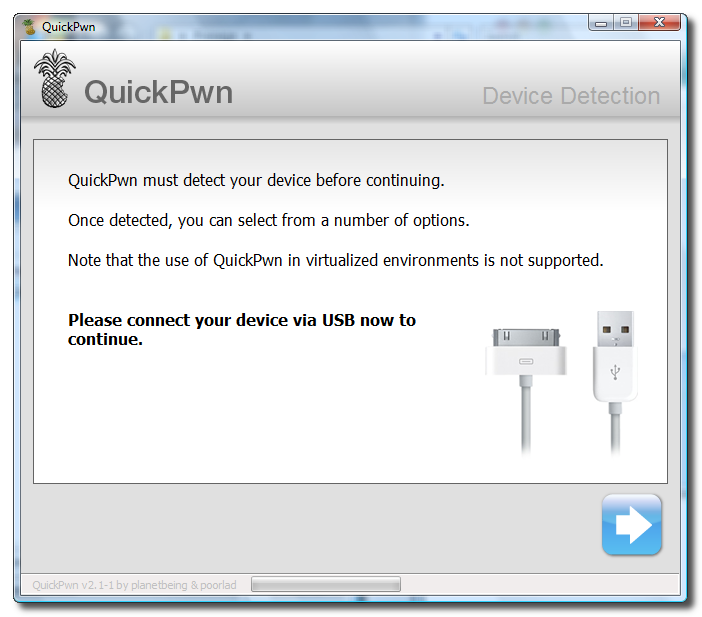
Once iTunes has finished updating your iPhone to the desired firmware you may launch QuickPwn.exe from the Pwnage folder on your desktop.

Step Four
Make sure you iPhone is connected to the computer and click the blue arrow to continue.

Step Five
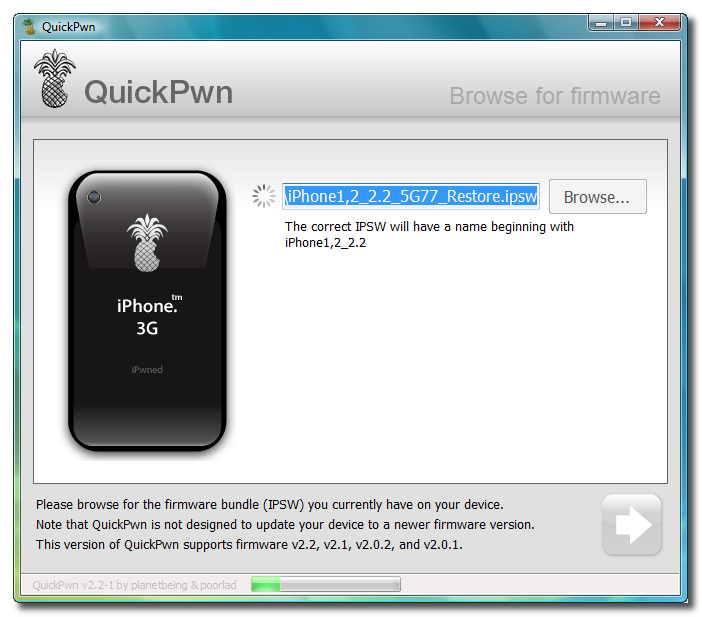
Click the Browse button to locate your iPhone firmware.

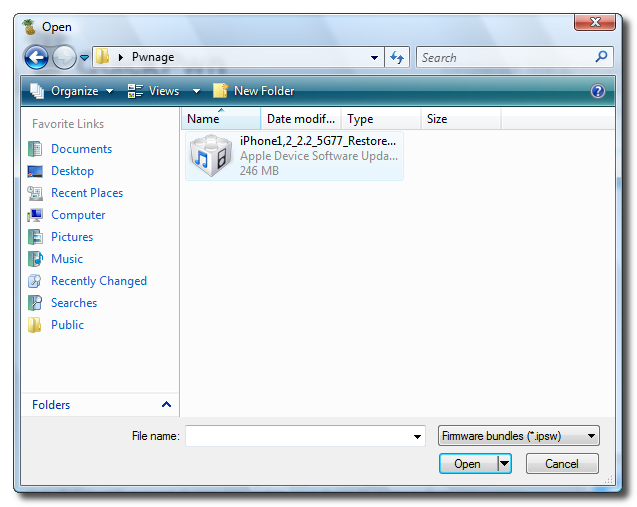
Step Six
Select the firmware ipsw from the Pwnage folder on your desktop then click the Open button.

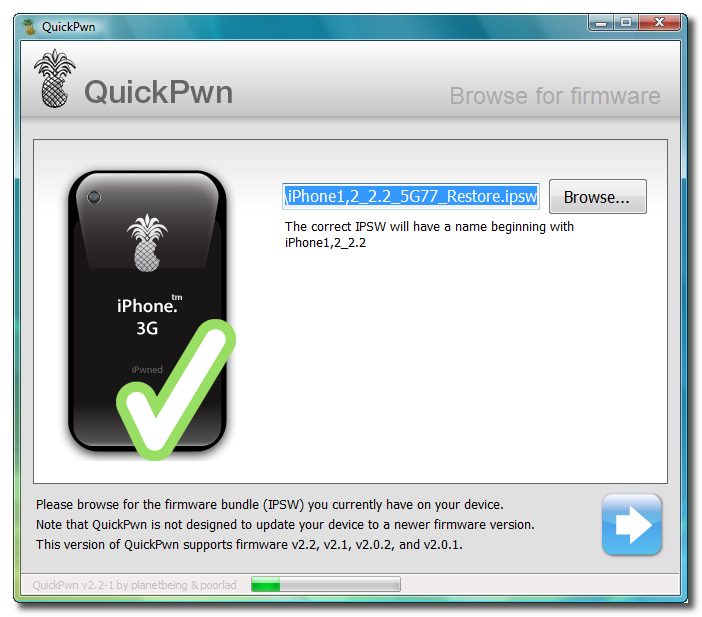
Step Seven
QuickPwn will check to make sure the ipsw is valid. Click the blue arrow button to continue.

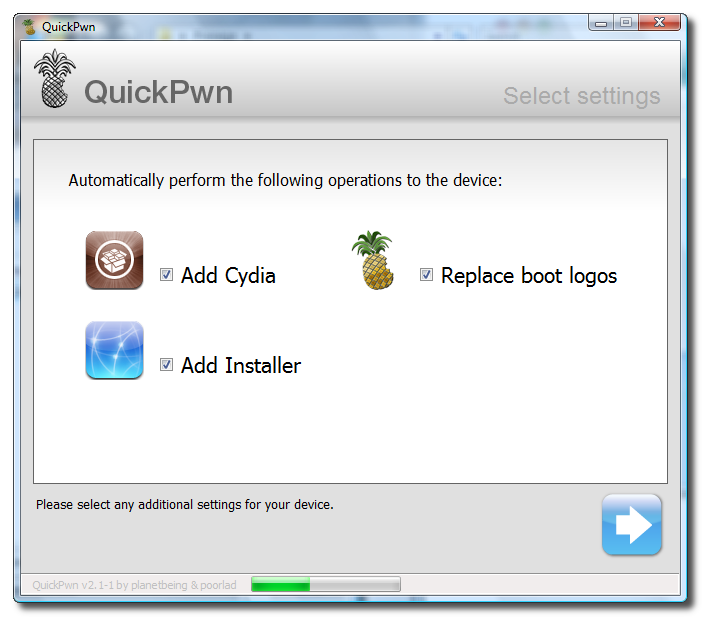
Step Eight
You can now select whether to Add Cydia, Add Installer, or Replace Boot Logos. Select the ones you would like to perform then click the clue arrow button

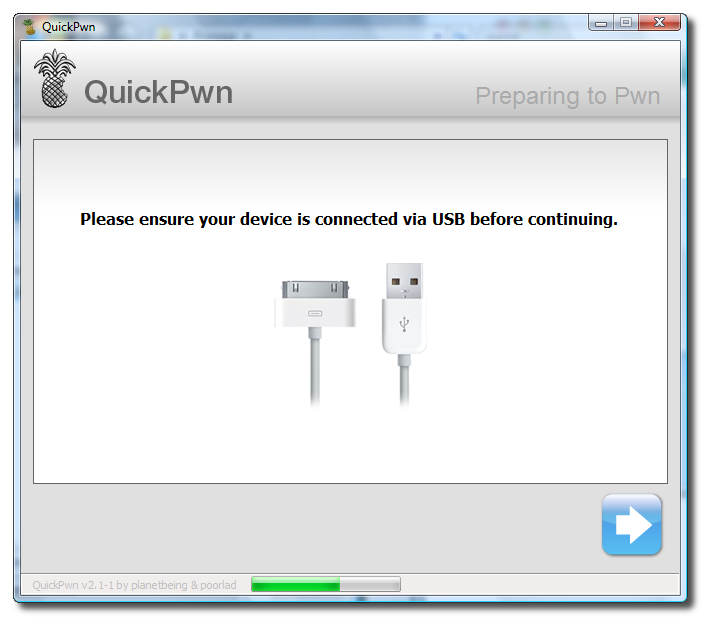
Step Nine
QuickPwn will now ask you to confirm your iPhone is connected via USB before continuing. Click the blue arrow button to proceed.

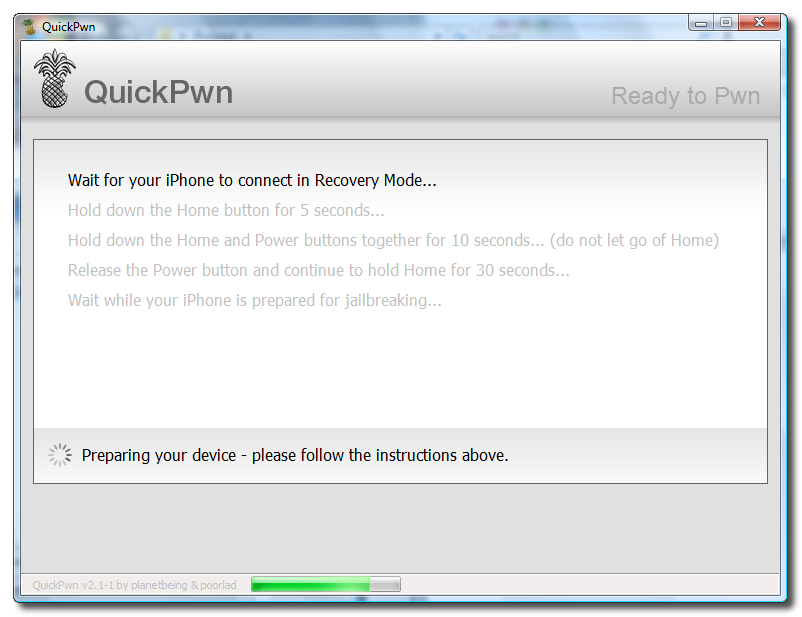
Step Ten
QuickPwn will now automatically put your iPhone into recovery mode. Once its in recovery mode you will be prompted to: Hold the Home button for 5 seconds, Hold the Home and Power buttons for 10 seconds, then release the Power button and continuing holding the Home button until your iPhone is in DFU mode.
Watch the prompts carefully and follow along.

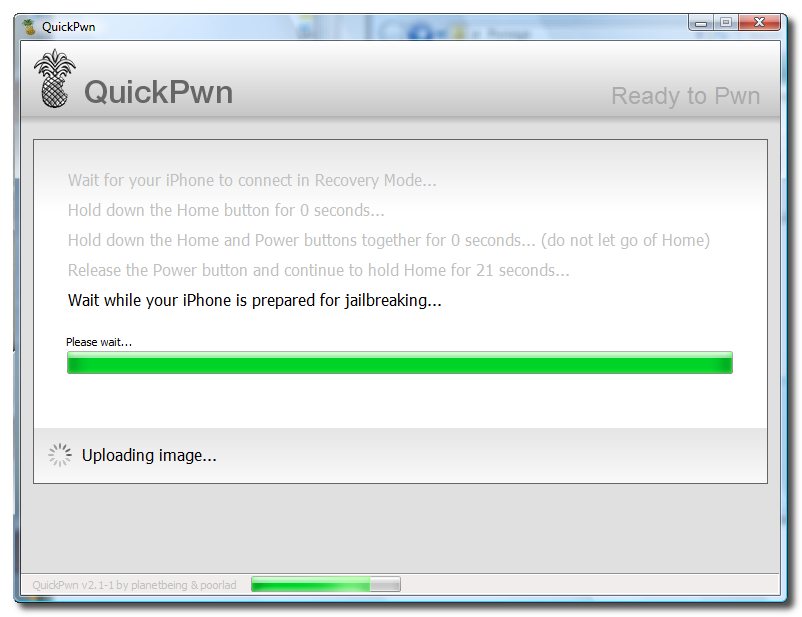
Step Eleven
Once QuickPwn detects your iPhone in DFU mode it will begin the jailbreak process.

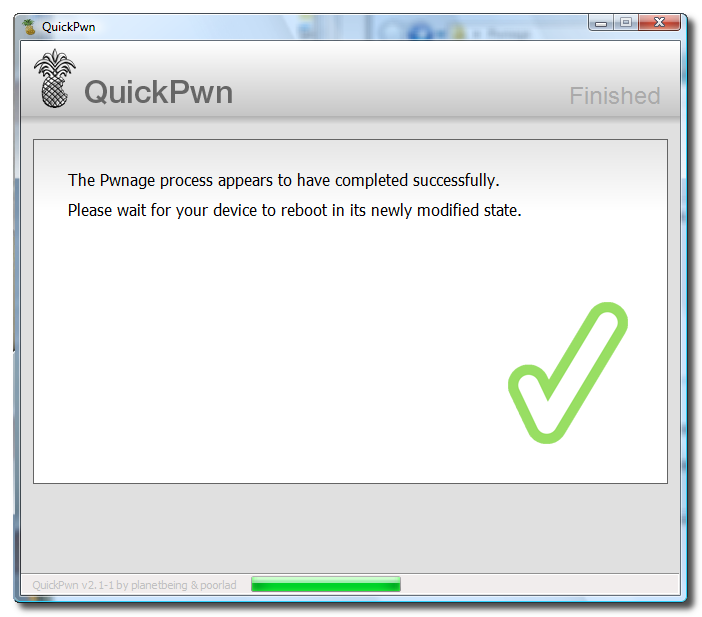
Step Twelve
Once jailbreaking is complete QuickPwn will inform you that it was successfull.

If you are intending to unlock your iPhone you can use this tutorial to jailbreak ONLY if you are on the 02.28 baseband or lower AND you restore to 2.2 (NOT 2.2.1). If you use this tutorial to restore and to jailbreak firmware 2.2.1 there is no unlock currently available. You can learn how to check your baseband version here
Step One
Create a folder called Pwnage on your desktop.
Download the following files and place them in the Pwnage folder you just created:
- QuickPwn-225-2.zip
FOR THOSE WHO WANT TO UNLOCK:
- 2.2.0 (3G): iPhone1,2_2.2_5G77_Restore.ipsw
FOR THOSE WHO DO NOT WANT TO UNLOCK:
- 2.2.1 (3G): iPhone1,2_2.2.1_5H11_Restore.ipsw
Extract the QuickPwn-225-2.zip file to the Pwnage folder.

Step Two
Connect your iPhone to the computer and launch iTunes.
Select your iPhone from the list of devices on the left. Now hold down shift and click the Restore button. Restore is preferred as it won't create any wasted space on your iPhone.
Navigate to the Pwnage folder on your desktop and select the firmware ipsw. Click the Open button to continue.

Step Three
Once iTunes has finished updating your iPhone to the desired firmware you may launch QuickPwn.exe from the Pwnage folder on your desktop.
Step Four
Make sure you iPhone is connected to the computer and click the blue arrow to continue.
Step Five
Click the Browse button to locate your iPhone firmware.
Step Six
Select the firmware ipsw from the Pwnage folder on your desktop then click the Open button.
Step Seven
QuickPwn will check to make sure the ipsw is valid. Click the blue arrow button to continue.
Step Eight
You can now select whether to Add Cydia, Add Installer, or Replace Boot Logos. Select the ones you would like to perform then click the clue arrow button
Step Nine
QuickPwn will now ask you to confirm your iPhone is connected via USB before continuing. Click the blue arrow button to proceed.
Step Ten
QuickPwn will now automatically put your iPhone into recovery mode. Once its in recovery mode you will be prompted to: Hold the Home button for 5 seconds, Hold the Home and Power buttons for 10 seconds, then release the Power button and continuing holding the Home button until your iPhone is in DFU mode.
Watch the prompts carefully and follow along.
Step Eleven
Once QuickPwn detects your iPhone in DFU mode it will begin the jailbreak process.
Step Twelve
Once jailbreaking is complete QuickPwn will inform you that it was successfull.
China Phone PC Suite
Here is China Phone PC Suite and china phone (cpu) usb driver.
Its help you to install java games or app in your china phone (if your phone have java supported option)
Download PC Suite and your phone usb driver. connect phone with pc than install cpu usb driver, now you can use it.
Its help you to install java games or app in your china phone (if your phone have java supported option)
Download PC Suite and your phone usb driver. connect phone with pc than install cpu usb driver, now you can use it.
Activation MTBox For users UFS/HWK
Dear, griffin Team
Users UFS/HWK be possible to play to use the software activacion of MTBox..
or free option Interface
Br,
.:: SaulCell ::.
The_Colombian_Team
Users UFS/HWK be possible to play to use the software activacion of MTBox..
or free option Interface
Br,
.:: SaulCell ::.
The_Colombian_Team
The Sl20 Module Activation Features
The Sl20 Module Activation Does the Following jobs
* Free unlock for all SL20 supported phones
* Free SD repair for all supported BB5 phones
* Free unlock for all DCT4+ supported phones
* Free unlock for new DCT4+ 1202, 1661, 1662, 5030 etc
* Free SP data repair on all DCT4+ phones
* Free Unlock all BB5+ Models pressing SL20_RPL BUtton
Best Regards GSMinfo.pl
nokia 5130 on nokia then white screen and off 100% tested solution
just go to tab service *gt; imei *amp; sucurity *gt; imei rebuild and click on write rpl
and just write this rpl tested on many phone's without damage his orignal imei
here is link to download tested rpl 5130xm_without_NPC_DATA__made_by_MxKey.rpl
if after write this rpl problem is same so
1.change his lcd
2.remove mmc ic
3.remove camera from board
and just write this rpl tested on many phone's without damage his orignal imei
here is link to download tested rpl 5130xm_without_NPC_DATA__made_by_MxKey.rpl
if after write this rpl problem is same so
1.change his lcd
2.remove mmc ic
3.remove camera from board
nokia 2700 incoming call time restart
solutions...
- try to flash by usb cable.
- change ear spker than check pa also try to flash
- or
- change batty ic its 100..ok
- try to flash by usb cable.
- change ear spker than check pa also try to flash
- or
- change batty ic its 100..ok
May 10, 2010
Download China Mobiles Flash Files By Version
M320_BOOTLOADER_V005_MT6228_M320V10_07_12_V1_3T06D 070810
http://www.4shared.com/file/10568328...06D070810.html
more....
link here...
http://forum.gsmhosting.com/vbb/f457/download-china-mobiles-flash-files-version-756019/
http://www.4shared.com/file/10568328...06D070810.html
more....
link here...
http://forum.gsmhosting.com/vbb/f457/download-china-mobiles-flash-files-version-756019/
China handfree solution collection here
G FIVE T580

more...
link here....
http://forum.gsmhosting.com/vbb/f457/china-handfree-solution-collection-here-1134346/
more...
link here....
http://forum.gsmhosting.com/vbb/f457/china-handfree-solution-collection-here-1134346/
Video Tutorials for XS++
Reading out/resetting the usercode:
The usercode will be read out on DB2010 phones.
XS++ will reset the usercode on DB2020 phones instead of reading it out.
Flashing with XS++:
This is an example for flashing with XS++:
Keep in mind that the EROM colour and CID of the firmware must match the EROM colour and CID of your phone!
Backing up and restoring the GDFS:
Do NEVER flash a GDFS backup to your phone which is not the original backup of the same phone if you're not 100% aware of what you're doing!
Backing up the GDFS with XS++
It's necessary to make a backup of the GDFS before you start flashing/modding your phone.The backup might save you later
Restoring the GDFS with XS++
XS++ Firmware
http://www.megaupload.com/?d=R3ZPS4YI FIRMWARE_D750_J220.zip
http://www.megaupload.com/?d=RWUGK6CL FIRMWARE_K310_510.zip
http://www.megaupload.com/?d=PR4V1FCO FIRMWARE_K310_K320.zip
http://www.megaupload.com/?d=PHGXWDOO FIRMWARE_KSERIES.zip
http://www.megaupload.com/?d=MU4D8GME FIRMWARE_K550.zip
http://www.megaupload.com/?d=JICBTFSG FIRMWARE_K530.zip
http://www.megaupload.com/?d=M0R8DX70 FIRMWARE_J300_K300.zip
http://www.megaupload.com/?d=JZPQBNA3 FIRMWARE_S700.zip
http://www.megaupload.com/?d=45UZIQHN FIRMWARE_V630.zip
http://www.megaupload.com/?d=KVDY0QFQ FIRMWARE_W200.zip
http://www.megaupload.com/?d=6CH1APQB FIRMWARE_W600.zip
http://www.megaupload.com/?d=RNAHIRO0 FIRMWARE_W610.zip
http://www.megaupload.com/?d=1D4A0AVT FIRMWARE_W660.zip
http://www.megaupload.com/?d=3T55XPN7 FIRMWARE_W660_W900.zip
http://www.megaupload.com/?d=6H3K4JDC FIRMWARE_Z530.zip
http://www.megaupload.com/?d=22UL1PHM FIRMWARE_Z1010.zip
http://www.megaupload.com/?d=WXVT7PCO FIRMWARE_W830.zip
http://www.megaupload.com/?d=T92II8BY FIRMWARE_W300i.zip
http://www.megaupload.com/?d=CKVHBQFV K700i.zip
http://www.megaupload.com/?d=O3D0Y2ZN K600i.zip
http://www.megaupload.com/?d=QCA975DG K300i_2.zip
http://www.megaupload.com/?d=G8F662RI K300i_1.zip
http://www.megaupload.com/?d=KR43JUVQ K790i_1.zip
http://www.megaupload.com/?d=QNTPO8A8 K790i_2.zip
http://www.megaupload.com/?d=8W41LOJN K800.zip
http://www.megaupload.com/?d=GQT6RN34 Z800i.zip
http://www.megaupload.com/?d=SLU3TWU2 K750.zip
http://www.megaupload.com/?d=LOMYCX20 K800.zip
http://www.megaupload.com/?d=DQH6LGZO K608i.zip
http://www.megaupload.com/?d=EQLZ573E W200i.zip
http://www.megaupload.com/?d=LAXRCSEN K610.zip
http://www.megaupload.com/?d=8BG0IOJA K610i.zip
Cara unlock paling efektif untuk semua blackberry :
1. download file mep reader lalu jalankan di pc atau laptop, pastikan sudah terinstall desktop manager atau driver Blackberry.
2. Colok kabel usb bawaan Blackberry ke pc atau laptop, lalu klik get handset info, setelah itu akan muncul imei dan versi mep, copy paste atau ketik lalu kirim ke kami via email jasaunlock@gmail.com . Code unlock untuk blackberry anda segera tersedia dalam 5 menit.
nb : cara ini cukup efektif untuk instan remote unlock anda juga bisa menggunakan software alternatif yang lebih komplit, silakan download disini
May 9, 2010
All SE Schematics,Service manuals & Trouble Shooting Guide Etc..
Sony Ericsson K610i / V630i Schematics

DOWNLOAD !!!
Sony Ericsson Z610i Schematics
DOWNLOAD !!!
Z770i Level 3 Service Manual

DOWNLOAD !!!
W380i / Z555i Level 3 Service Manual

DOWNLOAD !!!
G900i Level 4 Service Manual and Disassembly/Assembly Video

DOWNLOAD !!!

DOWNLOAD !!!
Sony Ericsson Z610i Schematics
DOWNLOAD !!!
K850i Level 4 Service Manual
Z770i Level 3 Service Manual
DOWNLOAD !!!
W380i / Z555i Level 3 Service Manual
DOWNLOAD !!!
G700i Level 4 Service Manual & Disassembly/Assembly Video
G900i Level 4 Service Manual and Disassembly/Assembly Video
DOWNLOAD !!!
C702i Level 4 Service Manual
Subscribe to:
Posts (Atom)